
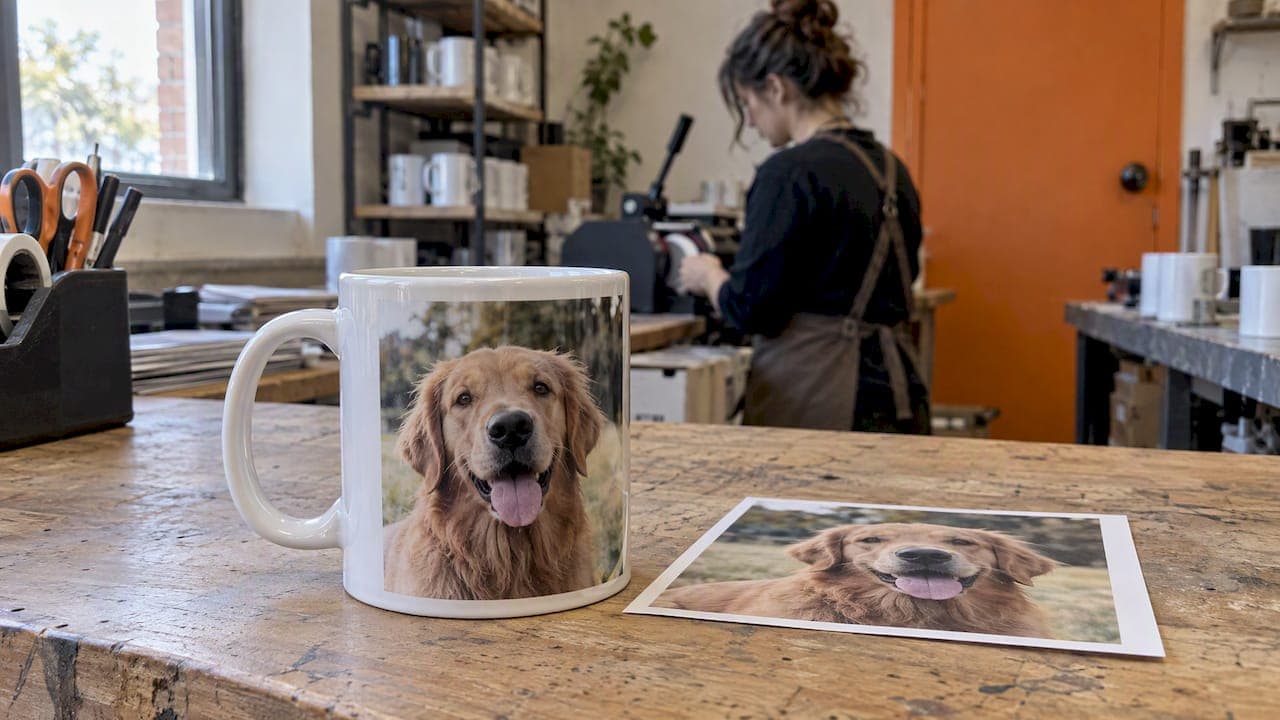
For a sharp photo on a mug, aim for an image of at least about 2,550 × 1,050 pixels if it will wrap the whole mug, or roughly 1,200 pixels on the short side if it sits as a single picture. Choose an original file from your phone or camera, never a screenshot or a social media download. Keep faces and key details away from the handle and the edges, then study the preview before you approve it.
This guide explains the numbers behind those figures, how to pick a photo that will print well, where to place it, and what to look at in the design proof. It is written for musicians, teachers and gift buyers in the UK who want a photo mug that looks as good in the hand as it did on screen.
TL;DR
- A full-wrap print on a standard 11 oz mug is about 8.5 × 3.5 inches, or 2,550 × 1,050 pixels at 300 DPI. Your photo does not need to match this exactly, but the closer it comes, the sharper the result.
- Pixels matter more than the DPI label. Raising a file's DPI setting without adding real detail does not make it sharper.
- Choose an original, well-lit photo with a clear subject. Avoid screenshots, heavily compressed messaging-app images and photos taken in dim light.
- Keep important detail, such as faces, names and instrument heads, away from the handle area and the outer edges.
- Check the proof at full size, look for soft edges and cropped details, and approve only when you are happy with what you see.
Table of Contents
- What resolution does a mug photo need?
- Why changing the DPI setting does not help
- Choosing a photo that will print clearly
- Where to place a photo on a mug
- What to check in the design preview
- Our perspective: photos, names and the music mug
- Photo or no photo? Matching the picture to the person
- Order a photo mug with us
- Frequently asked questions
- Sources
What resolution does a mug photo need?
The short answer is pixels, not a magic DPI number. A mug is printed at a fixed physical size, so what counts is how many real pixels of picture information your file holds across that size.
A commonly used figure for an 11 oz mug is a full-wrap template of about 8.5 × 3.5 inches, which is 2,550 × 1,050 pixels at 300 DPI, according to a sublimation mug template calculator. That is the mug's circumference minus a gap around the handle, where the transfer cannot reach. Different mug shapes and different print workshops use slightly different templates, so treat these numbers as a working benchmark, not a universal rule.
Here is how the arithmetic works in practice. Dividing pixels by inches gives you the effective resolution:
| Photo size (pixels) | Printed at 4 inches wide | Printed at 8.5 inches wide |
|---|---|---|
| 1,200 × 1,000 | 300 PPI, sharp | About 141 PPI, visibly soft |
| 2,000 × 1,500 | 500 PPI, very sharp | About 235 PPI, acceptable for most photos |
| 2,550 × 1,050 | Above 600 PPI, more than enough | 300 PPI, sharp |
| 800 × 600 | 200 PPI, borderline | About 94 PPI, blurry |
The rule of thumb is simple. A single photo placed on one side of the mug, around 4 inches wide, looks sharp from roughly 1,200 pixels across. A photo stretched around the full wrap needs close to 2,550 pixels across. Anything under about 150 pixels per inch at the printed size will begin to look soft, particularly on faces and fine lines such as strings or sheet music.
Modern phone photos clear these numbers easily. A typical smartphone picture is several thousand pixels wide, so the original file from your camera roll is usually all you need. The problem starts when the file has been shrunk, screenshotted or passed through a chat app that compresses it.

Why changing the DPI setting does not help
A surprisingly common mistake is opening a small image in an editor, changing its DPI from 72 to 300, and assuming the job is done. It is not. DPI is a label that tells software how large to print the file. It does not add detail that was never captured.
An 800 × 600 pixel picture still contains 800 × 600 pixels whatever number is written in its metadata. Enlarging it by resampling only invents new pixels by guessing, which softens the picture rather than sharpening it. If you want a plain explanation of why pixel count and print size matter more than the DPI figure, this guide to photo sizes, pixels and printing works through a familiar print size step by step.
The practical consequence: when a file is too small, go back to the source. Find the original on your phone, ask the sender for the full-size version, or choose a different photo. Do not try to rescue it with a DPI change.
Choosing a photo that will print clearly
Resolution is only half the story. A technically large file can still print badly if the photo itself is weak. Work through these checks before you upload.
Start with the original file
Use the file straight from the camera or phone. Photos downloaded from social media, saved from messaging apps or captured as screenshots are usually shrunk and compressed. They may look fine on a phone screen, but a mug is a physical object held at arm's length, and the loss shows.
A quick test: open the picture on a computer and zoom to 100 per cent. If edges look blocky or smeared when you do, the mug will show the same.
Look for light and contrast
Mug printing uses a heat-transfer process, and a photo that is dark, grainy or low in contrast tends to lose detail further in the transfer. Pick pictures taken in daylight or good indoor light. A subject who stands out from the background will read well at mug scale.
For musicians, this often means choosing the rehearsal-room photo over the dim gig shot. A violinist caught in window light prints better than a stage photo lit by a single spotlight and a lot of noise.

Keep the subject simple
A mug is small. A busy group photo with twelve faces will shrink those faces to the size of a thumbnail. Choose:
- One to three people, or one instrument and its player.
- A clear focal point, such as a face, a hand on a fretboard or a drum kit.
- A background that does not compete, such as a plain wall, a sky or a blurred room.
If you only have a crowded photo, crop to the part that matters before uploading, provided the cropped result still has enough pixels, as in the table above.
Think about colour
Screens glow and mugs do not. Colours on a monitor are made of light, while a printed mug uses ink on a ceramic surface, so the result is normally a little less vivid. Very bright neon tones and deep, near-black shadows are the areas most likely to shift. A photo with natural, balanced colour usually translates most faithfully.
Black and white is a safe choice
If you are unsure about the colour, a black-and-white conversion of a well-lit photo often prints beautifully and suits the sketched, understated look many musicians like. It also hides slight colour differences between screen and print.
Where to place a photo on a mug
A mug is a curved surface with a handle, and that shapes every placement decision. There are three common layouts.
- Single photo on one side. The picture sits opposite or beside the handle, and the other side carries text or stays blank. This is the most forgiving layout and suits portraits.
- Two photos, one on each side. Each side is roughly half of the full wrap, so each image has less room. Choose pictures that work at a smaller size.
- Full wrap. One image, or a collage, runs around the whole mug. It looks striking but asks for the highest resolution and the most careful placement.
For a deeper look at the printable areas of different mugs, our guide to mug print area sizes for music mugs covers the canvas dimensions, and choosing between 11 oz and 15 oz mugs by print area explains how the larger mug changes your options.
Keep key detail inside the safe zone
Two areas are at risk. The first is the handle gap, where the print stops or curves out of sight. The second is the outer edge of the design area, where a slight shift during printing can trim the picture. A sensible habit is to leave a margin of a few millimetres around anything you cannot afford to lose, and to keep faces and names well clear of the handle.
Practical placement rules:
- Put faces and names in the middle of the visible side, not at the edges.
- Leave breathing room above and below a face so it is not clipped by the rim or the base.
- Do not wrap a face across the seam of a full-wrap design. Curvature will distort it as it turns away from the viewer.
- For left-handed drinkers, remember the picture sits on the other side. If it matters, ask which side faces the drinker when the mug is held normally.
Text and photo together
A name, a short quote or a gift message works well next to a photo, provided it is not squeezed. Our guide on character limits for names and lines of text shows how much text fits comfortably, and text versus photo mugs for music gifts helps you decide which one suits the recipient.
What to check in the design preview
The preview, or proof, is your last chance to catch problems for free. Take two minutes over it.
- Zoom in. View the photo at full size. If it looks soft or blocky on screen, it will look the same, if not worse, on the mug.
- Check the crop. Make sure heads, hands and instrument details are all inside the frame, with nothing sliced by an edge.
- Locate the handle. Confirm which side the handle is on and that nothing important sits near it.
- Read every word. Names, dates and quotes should be spelled correctly. A typo on a mug is permanent.
- Compare orientation. Check that the picture is the right way up and has not been flipped or rotated by the upload.
- Think about colour. Remember the print will be slightly less luminous than the screen.
- Approve deliberately. Only approve when every point above is settled. If something looks off, ask for an adjustment rather than hoping it will print better than it previews.
For gifts, build in time for proofing before the date you need the mug. Our notes on avoiding personalised mug delays in the UK explain how proofs, postage and image rights fit together. If the photo is not yours, such as a professional portrait or a picture of a performance, check you are allowed to reproduce it before ordering.
Our perspective: photos, names and the music mug
Most blurry mugs we hear about do not fail because of the printer. They fail because the image that was uploaded was never big enough, or because an important detail sat too close to the handle. Both are easy to prevent, and both are easier to prevent before ordering than after.
Our own approach is built around musicians and the people who buy for them. A drummer's photo, a student's first recital picture or a teacher's thank-you gift all have the same requirement: the subject must be recognisable and the picture must sit where the eye lands naturally when the mug is lifted. That is why we favour simple compositions, one clear subject and a modest amount of text.
We also think a photo is not always the best answer. A clean instrument sketch or a well-chosen line of humour can feel more personal than a small, crowded snapshot. If you are unsure, our guide to text versus photo mugs lays out the trade-offs, and our music teacher mug design workflow shows how we think through a design from first idea to final proof.
The principle is the same everywhere: a mug is a small canvas that rewards restraint.
— Lasse
Photo or no photo? Matching the picture to the person
Different recipients suit different approaches. These are the pairings we find work best.
| Recipient | Layout that tends to work | Why |
|---|---|---|
| A musician who loves their instrument | Instrument-led design with a small portrait | The instrument carries the personality |
| A music teacher | Class or ensemble photo cropped tight, plus a short message | Keeps faces large enough to recognise |
| A grandparent | One clear portrait of the child playing | Simple, emotional and easy to read |
| A band member | Full-wrap collage or live photo in good light | Room for atmosphere, if resolution allows |
| A student | Sketch-style design with name | Personal without relying on photo quality |
If none of the photos you own are quite good enough, an illustrated design is often the stronger gift. Our instrument sketch mugs are made for exactly that situation.
Order a photo mug with us
If you have a good photo and a musician in mind, we can help you turn it into a mug that holds up in daily use. Browse our personalised photo mugs for music lovers for ideas, or start from our full personalised music mug range if you want instruments, humour or names alongside, or instead of, a photo.

Before you upload, run through the checks in this guide: original file, good light, clear subject, key detail away from the handle. Those four habits solve most problems before they begin.
Frequently asked questions
What is the minimum resolution for a photo on a mug?
For a single photo on one side of an 11 oz mug, roughly 1,200 pixels across the shorter dimension is a sensible minimum. For a full wrap, aim for about 2,550 × 1,050 pixels, the size of a typical full-wrap template at 300 DPI. Lower resolutions can still print, but expect visible softness, especially in faces.
Can I use a photo from my phone?
Yes, as long as you use the original file and not a screenshot or a copy sent through a messaging app. Phone cameras usually produce far more pixels than a mug needs. If the picture looks crisp when you zoom in on a computer, it is likely to print well.
Will my photo be cropped around the handle?
The area next to the handle cannot be printed in the same way as the rest of the mug, so detail placed there may be lost or distorted. Keep faces, names and important objects in the centre of the visible side, and check the proof to confirm nothing sits near the handle.
Does the mug print look the same as my screen?
Not exactly. A screen emits light and a mug reflects it, so printed colours tend to look a little less vivid, and very dark shadows can lose detail. Photos with natural colour and good lighting translate best, and black-and-white conversions are a dependable alternative.
Should I fix a small photo by raising its DPI?
No. Changing the DPI label does not add picture information, so the photo will not look sharper. Find a larger original, ask the sender for the full-size file, or choose another picture.
Sources
- Sublimation mug size and template calculator
- 5x7 photo size: inches, pixels, ratio and printing tips