
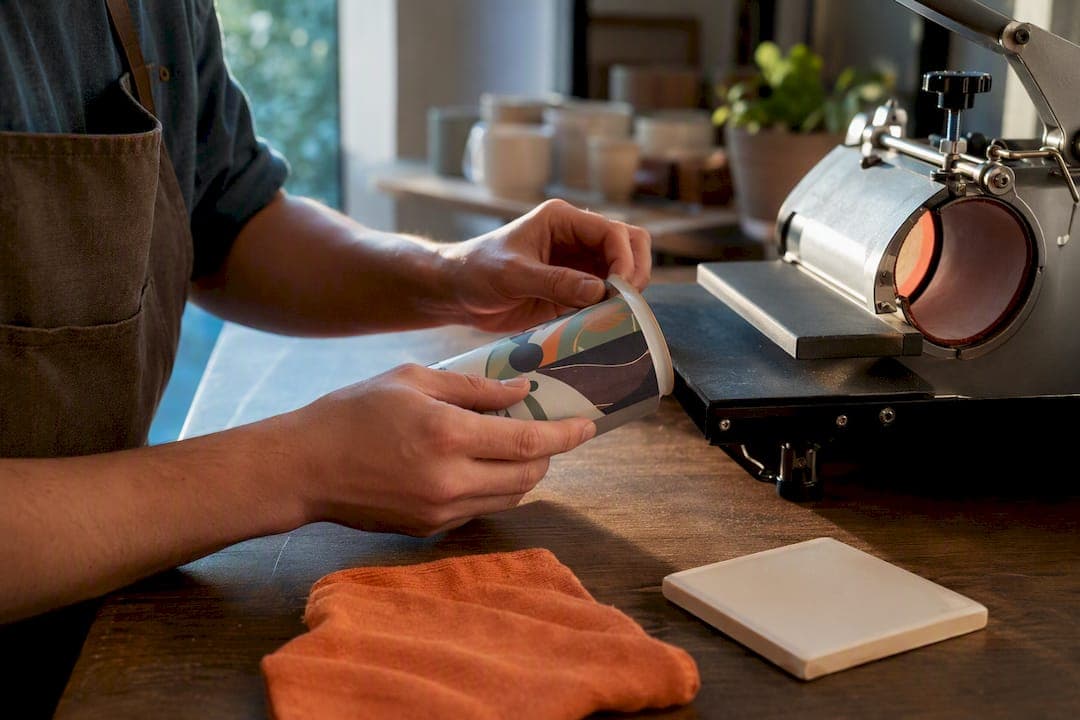
For full-colour photo wraps, sublimation is the method to reach for. For large-quantity branded mugs where exact colours matter, screen printing and kiln-fired decals win on durability and cost. Dark or metal mugs need UV digital printing or laser engraving, and premium one-off pieces suit engraving or fired decals. Material and order volume decide the winner, so use the checklist below before you commit to a supplier.
TL;DR:
- Screen printing and kiln-fired decals are most cost-effective and durable options for large-volume orders requiring precise Pantone color matching.
- Digital UV printing and laser engraving are better suited for dark, metallic, or textured surfaces, despite higher unit costs.
- Heat transfer and DTF printing offer low-cost and quick options for small runs, prototypes, or testing design concepts, but with lower durability.
- Proper sample testing before bulk orders is crucial because digital proofs don't reveal how designs hold up after multiple dishwasher cycles or heavy handling.
- Choosing the right method depends mainly on order volume, surface material, durability needs, and design complexity, not just on print quality.
Table of Contents
- Mug printing methods at a glance
- Sublimation printing: the default for photo-quality mugs
- Screen printing and kiln-fired decals for bulk logo orders
- Heat transfer and DTF printing for small runs and prototypes
- Digital UV printing for dark mugs, glass and metal
- Laser engraving and decal firing for permanent, premium marks
- Pad printing for handles, lids and awkward shapes
- How to choose the right printing method for your order
- Mugnificentdeals' design-spec checklist for print-ready artwork
- Why most buying guides get this comparison backwards
- Sources
- FAQ
Mug printing methods at a glance
Six methods cover almost every custom mug project you'll encounter, and each one earns its place for a different reason. Knowing the single best use for each saves you from asking a supplier for the wrong process.
- Sublimation: best for full-colour photos and personalised gifts on light-coloured, coated mugs.
- Screen printing / kiln-fired decals: best for high-volume logo runs needing exact Pantone colours.
- Heat transfer: best for small, low-cost runs and quick prototypes.
- Direct-to-film (DTF): best for small runs that need to work on dark mugs without a UV setup.
- Digital UV printing: best for dark, glass or metal surfaces and textured, layered effects.
- Laser engraving / decal firing: best for permanent, premium marks on metal or porcelain.
- Pad printing: best for small logos on handles, lids or awkward curved areas.
The trade-offs split along four lines: durability, cost at your volume, which materials the method actually bonds to, and the minimum order a supplier will accept. Sublimation and heat transfer sit at the low-volume, low-cost end. Screen printing rewards bulk orders but punishes one-off jobs with setup fees. UV printing and laser engraving cost more per unit but open up materials the others can't touch. Once you know your rough order size and your mug's finish (glazed ceramic, dark stoneware, stainless steel), you can skip straight to the relevant section below rather than reading the whole field.
Sublimation printing: the default for photo-quality mugs
Sublimation printing works by heating special dye-based ink until it turns to gas, which then bonds permanently into a polyester coating baked onto the mug. There's no ink sitting on top of the ceramic. The dye becomes part of the coating itself, which is why sublimated designs feel completely smooth to the touch and don't peel, crack, or fade the way a surface print can.
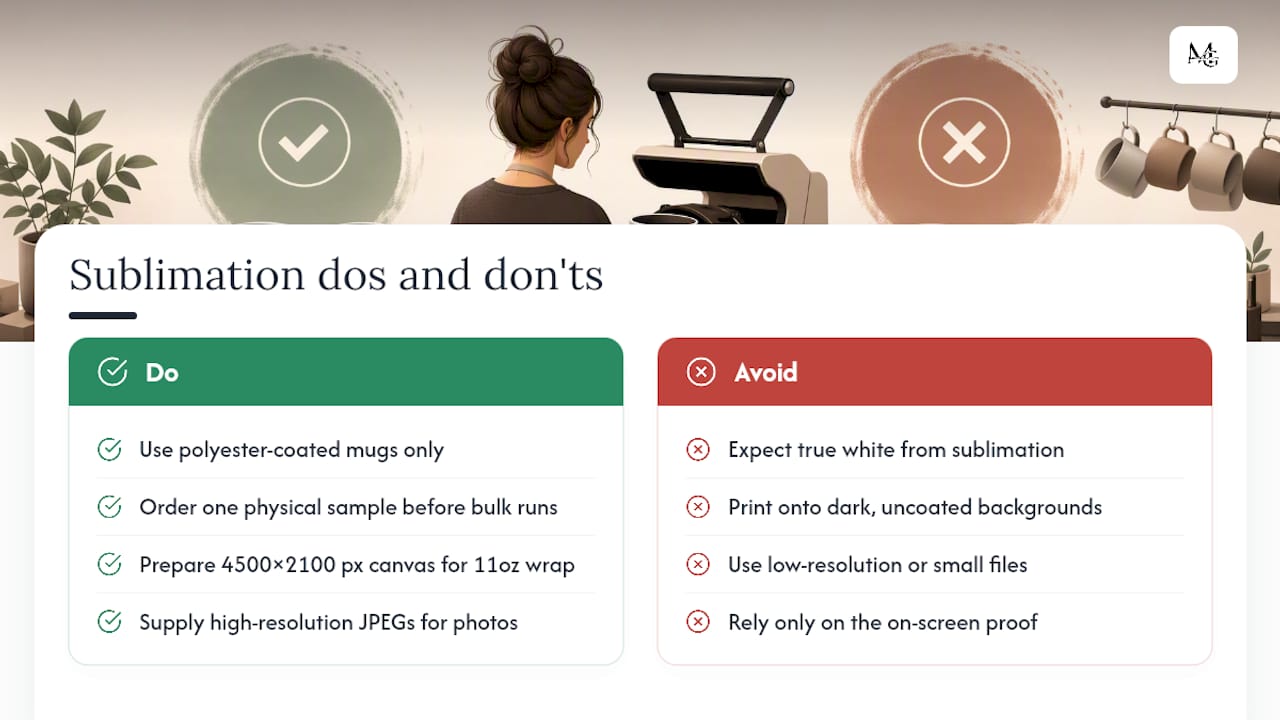
That chemistry makes sublimation the standard choice for photo wraps, gradients, and any design with lots of colour blending, like a hand-drawn instrument sketch or a full-mug landscape print. The catch is the coating requirement: sublimation only works on mugs pre-treated with a polymer coating, and it generally can't produce true white or print convincingly on dark backgrounds, because there's no white ink to sit underneath the design.
For file prep, aim for a canvas around 4500 by 2100 pixels for a standard 11oz wrap, supplied as a high-resolution JPEG for photographic content. Anything smaller and you'll see softness around fine details like sheet music notation or fretwork.
Pro Tip: Always order one physical sample before a bulk run, even if the digital proof looks perfect. Screen colours and sublimated colours don't always match, particularly with warm reds and deep blues.
Care-wise, sublimated mugs handle repeated dishwasher cycles well because the design lives inside the coating rather than on its surface. For day-to-day guidance on keeping any printed mug looking new, our mug care instructions cover the basics. If you're deciding between formats for a photo-heavy design, our comparison of 11oz and 15oz mugs by print area is worth a read before you finalise your canvas size, and our best personalised photo mugs for music lovers collection shows what sublimated photo work looks like in practice.
Screen printing and kiln-fired decals for bulk logo orders
Screen printing pushes ink through a fine mesh screen onto the mug, one screen per colour, then fires the mug in a kiln to fuse the pigment into the glaze. That firing step is what gives screen-printed and decal-fired mugs their reputation: properly fired designs can survive hundreds of dishwasher cycles without fading, chipping, or dulling.
This is the method for brand-critical work. If your logo has to match an exact Pantone reference, screen printing and kiln-fired decals are preferred for exact Pantone colour matching, since CMYK-based sublimation can shift saturated or warm tones slightly. Cafés, corporate gift orders, and any project where colour consistency across hundreds of units matters should default here.
The economics only work in your favour at volume, though:
- Each colour in your design needs its own screen, so a five-colour logo costs more to set up than a single-colour wordmark.
- Setup fees are fixed regardless of order size, which makes screen printing expensive for a very small run and more cost-effective per unit for large orders.
- Minimum orders from most suppliers tend to sit in the low hundreds, because the setup cost needs spreading across enough units to make sense.
- Fine gradients and photographic detail don't translate well through a screen, so this method suits flat logos and text far better than photos.
If your business is ordering branded mugs for events, staff, or retail stock in bulk, budget for the screen setup as a one-time cost that pays for itself past a few hundred units. Below that threshold, sublimation or heat transfer will almost always be cheaper.
Heat transfer and DTF printing for small runs and prototypes
Heat transfer and direct-to-film printing both apply a pre-printed design to the mug's surface using heat and pressure, but they work differently under the hood. Traditional heat transfer uses an adhesive-backed film that sits on top of the ceramic. DTF adds a white ink underbase to that film, which is what makes it possible to print bright, opaque colours on dark mugs, something sublimation simply cannot do without a coated light-coloured blank.
Both methods are the cheapest entry point into custom mugs, which is exactly why hobbyists, Etsy sellers, and anyone testing a design before committing to a bigger order gravitate towards them. No specialist coating is required, equipment costs are low, and you can produce a single mug without any setup fee.
- Best for one-off gifts, market samples, and proving a design works before ordering in volume.
- Durability sits below sublimation and kiln-fired decals: the design sits on the surface rather than fusing into it, so expect gradual fading with heavy dishwasher use over time.
- Label these mugs for hand-washing or gentle dishwasher cycles if longevity matters to the buyer.
- DTF narrows the durability gap versus older adhesive transfers thanks to improved films and adhesives, making it a reasonable middle ground when you need dark-mug capability without buying sublimation equipment.
Pro Tip: Treat heat transfer and DTF as your testing phase. Once a design proves popular, moving production to sublimation or UV printing usually pays back the switch within a few hundred units through better durability and lower long-term returns.
Digital UV printing for dark mugs, glass and metal
UV-curable digital printing sprays ink directly onto the mug's surface and cures it instantly with ultraviolet light, layer by layer. Because the ink cures on contact rather than needing a coated blank, printers can lay down a white ink layer first, then build full colour on top of it. That underbase is what makes opaque, vivid printing possible on dark ceramic, glass, and brushed metal, surfaces that sublimation can't reach.
This makes UV printing the go-to when a design absolutely needs to sit on a black or navy mug, a glass stein, or a stainless steel travel cup. It also opens design options the other methods don't offer: because ink builds up in physical layers, you can create subtle raised texture or embossed-feeling detail, useful for logos that want a tactile finish or instrument illustrations with a slightly dimensional edge.
- Works reliably on dark-coloured mugs, glass, and metal, not just standard glazed ceramic.
- Suits small-to-medium retail runs better than mass bulk orders, since it doesn't carry screen printing's fixed setup cost.
- Recommend hand-washing or top-rack-only dishwasher use, since surface-cured ink behaves differently to fired or sublimated designs under prolonged heat and abrasion.
- Layering multiple passes lets designers add texture or a slight 3D effect that flat printing methods can't replicate.
If your product line includes darker mugs or metal travel cups alongside standard ceramic, UV printing is usually the method that lets you keep one consistent design across every surface.
Laser engraving and decal firing for permanent, premium marks
Laser engraving and decal firing sit at the premium end of mug decoration, and they work in almost opposite ways. Laser engraving ablates the surface, burning away a coating or etching directly into metal, to reveal the material underneath. There's no ink involved, which is exactly why it's effectively permanent: there's nothing sitting on the surface to wear off. Decal firing, by contrast, fuses ceramic pigments into the glaze during a kiln firing, a technique long used for high-fire porcelain and bone china.
Both methods target buyers who want something that reads as a lasting object rather than a printed gift. Executive and corporate gifts, restaurant and hotel service ware, and engraved metal travel mugs all lean on these techniques because the mark survives years of daily handling.
- Laser engraving works on metal and coated surfaces, producing a monochrome, tactile result rather than full colour.
- Decal firing suits porcelain and bone china where a fired-in ceramic finish matters more than photographic detail.
- Both are genuinely dishwasher-safe over the long term, since there's no surface layer to degrade.
- Expect a more restrained aesthetic: engraving is essentially always single-tone, and fired decals work best with clean, well-separated colour areas rather than photographic gradients.
Choose these methods when the mug is meant to be kept, not used and replaced, and when the buyer is paying for permanence as much as the design itself.
Pad printing for handles, lids and awkward shapes
Pad printing solves a problem none of the other methods handle well: printing on curved, recessed, or oddly angled surfaces like a mug handle, a lid, or a narrow rim. A silicone pad picks up ink from an etched plate and presses it onto the mug's contoured surface, flexing to reach areas a flat screen or printhead can't.
It's rarely used as a mug's primary decoration method. Detail and colour range are limited compared with sublimation or UV printing, so pad printing tends to handle secondary marks: a small maker's logo on the handle, a brand stamp on the base, or a date on the underside of a lid.
- Best suited to single-colour or two-colour logos rather than photographic detail.
- Commonly combined with a main-body method, such as a sublimated design on the body paired with a pad-printed logo on the handle.
- Setup is relatively quick per plate, making it viable even for moderate order sizes when the mark itself is small.
If your design brief calls for branding somewhere the main printing process can't reach, ask your supplier whether they offer pad printing as an add-on rather than assuming one process has to cover the whole mug.
How to choose the right printing method for your order
Six criteria decide the right method almost every time: design complexity, substrate, order volume, how long the mug needs to last, budget, and turnaround time. Work through them in that order and the shortlist narrows itself fast. A photo-heavy design on a light mug for a run of twelve points straight to sublimation; a five-colour logo on four hundred branded mugs points to screen printing.
Before you commit budget, put these questions to any supplier:
- Can you send a physical printed sample before I confirm a bulk order?
- What coating or blank type does this mug need, and can you supply it?
- How many dishwasher cycles has this specific finish been tested against?
- What file format and resolution do you need from me, and what happens if my file falls short?
- What's your minimum order for this method, and does price break at higher volumes?
- How do you handle colour matching if I need an exact Pantone reference?
- What's your standard turnaround from approved proof to delivery?
- Do you charge separately for design setup, or is that included?
- What happens if a printed batch doesn't match the approved proof?
- Can this method handle my mug's colour (dark, metallic, or glass)?
Treat vague answers as a warning sign. A supplier who can't quote a rough dishwasher-cycle expectation, won't send a sample before a bulk run, or gives no guidance on file specifications is asking you to gamble on a batch you can't inspect first. Testing samples under realistic conditions, including a few real dishwasher cycles and some ordinary daily handling, catches problems that a digital proof never will.
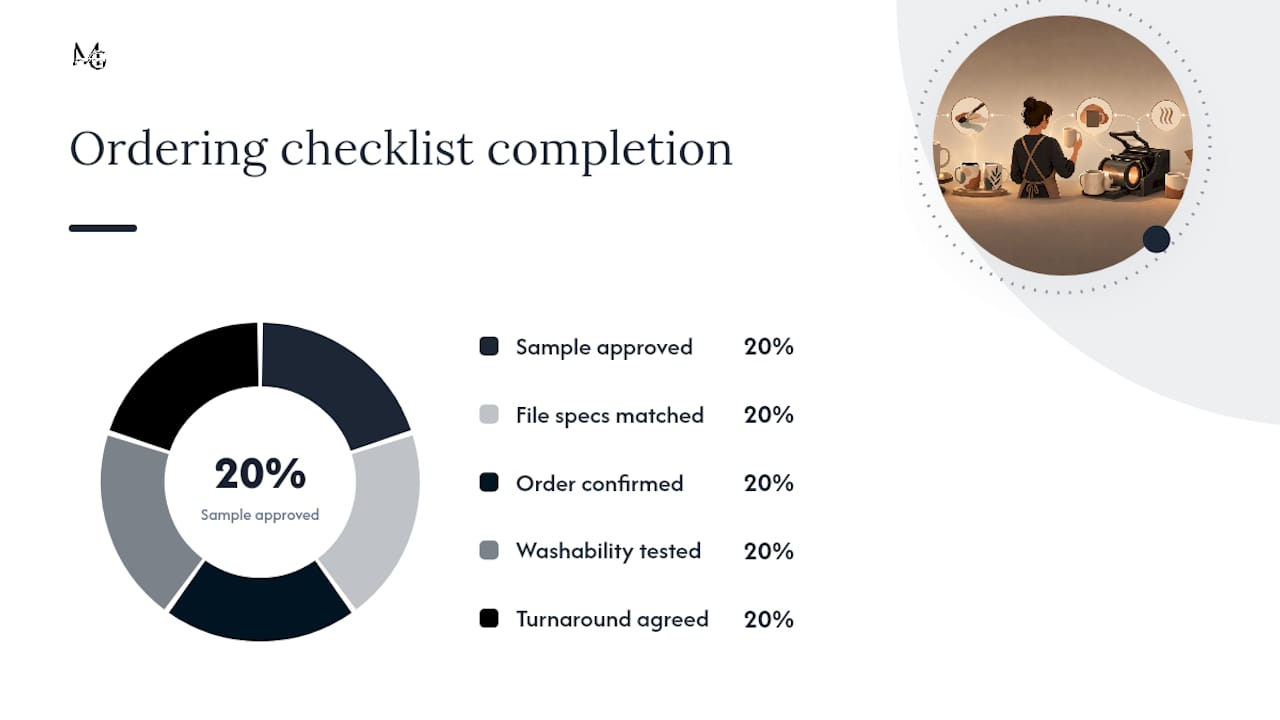
Pro Tip: Keep a simple ordering checklist: confirmed sample approved, file specs matched to the method, minimum order and price break confirmed, washability tested, turnaround date agreed in writing. Five ticks, and you're ready to place the full order with confidence.
Mugnificentdeals' design-spec checklist for print-ready artwork
Getting artwork right the first time saves everyone a round of proofing emails. A consistent set of specifications is recommended across music-themed mug lines, and the same principles apply whatever printing method you're using elsewhere.
- Supply photographic artwork, such as a portrait for a photo mug, as a high-resolution JPEG on a canvas of roughly 4500 by 2100 pixels for standard wraps.
- Send logos, instrument icons, or line-art sketches as vector files (EPS or SVG) or high-resolution transparent PNGs, so edges stay crisp at any size.
- Keep personalised text (a student's name, a teacher's title, an inside joke about a French horn) within sensible character limits agreed with your supplier before final proofing, since long strings often need font resizing that changes the whole layout.
- Build a small library of reusable design assets, instrument silhouettes, clef symbols, common phrases, the way a music teacher's mug design workflow does, so future orders don't start from a blank canvas.
- Follow a proofing sequence: rough layout, colour proof, physical sample, final approval, in that order, every time.
For a deeper walkthrough of formatting personalised text and choosing layouts that suit a specific mug shape, our guide on how to personalise your music mug covers the finer points of getting a design print-ready.
If you're ready to put any of these specs into practice, browse personalised music mugs, including instrument-themed and funny music designs, or look at the instrument personalised sketch mugs for an example of how fine linework prints in practice. For gift buyers, the best personalised music mugs for gifts collection and the Composer Music History Mugs line both show what fired, durable printing looks like on a finished product.
Why most buying guides get this comparison backwards
Most comparisons rank printing methods by quality, as if there's one winner. That misses the point entirely. The right method is the one that matches your substrate and your order size, and no amount of print quality fixes a sublimated design ordered on the wrong coating or a five-colour screen print run of fifteen mugs.
The advice that gets underweighted almost everywhere is sample testing. A digital proof tells you nothing about how a design survives forty dishwasher cycles or a season of daily handling, yet plenty of buyers skip straight from proof approval to bulk order. That gap between what looks right on screen and what holds up in use is where most disappointment comes from, not the printing method itself.
If you take one thing from this comparison, prioritise the physical sample over the digital mockup, every time, regardless of which method you choose. Everything else, colour matching, file specs, minimum orders, is negotiable. Durability under real use is not something a supplier's word alone can prove.
— Lasse
Sources
- Dye-sublimation printing — Wikipedia
- How to make custom mugs: a design guide for logos and photos — Custom Ink
- Sublimation vs screen printing vs heat transfer: mug printing methods compared — MugCrafts
- How sublimation vs screen printing affects your mug quality — VintFint
FAQ
How can I print my own mugs at home?
Home mug printing typically means heat transfer or an entry-level sublimation setup: a heat press or mug wrap, printed transfer paper, and a coated mug blank if you're using sublimation. It's the most accessible starting point for small runs and one-off gifts.
What kind of printer do I need to print on mugs?
Sublimation requires a printer loaded with sublimation ink (often a converted inkjet printer), while UV digital printing and screen printing need specialist industrial equipment usually only found at commercial print suppliers. For home heat transfer, a standard inkjet or laser printer paired with transfer paper is enough.
What machine do I actually need for mug printing?
At minimum, you need a heat press or mug wrap heater to bond the design to the mug's surface, alongside your chosen printing method, sublimation printer, transfer paper and printer, or access to a supplier with UV, screen, or laser engraving equipment.
Can heat transfer mugs go in the dishwasher?
Heat transfer mugs can be washed in dishwashers occasionally, but designs may fade faster than sublimated or kiln-fired prints with frequent washing.
Which printing method works best on dark-coloured mugs?
Digital UV printing and direct-to-film (DTF) both handle dark mugs well because they apply a white ink underbase before adding colour, something standard sublimation cannot do without a light-coloured coated blank.