
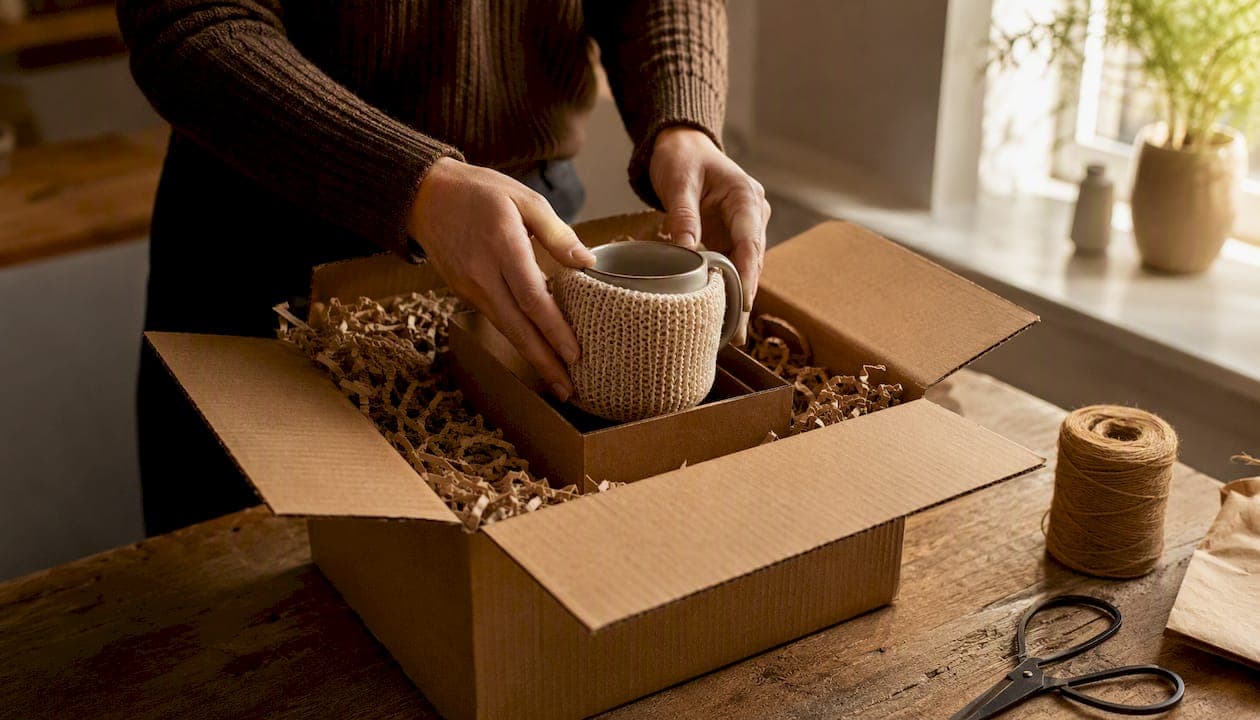
The single best way to ship a mug safely is to double-box it with at least 5cm of cushioning around the inner box, seal every seam with H-tape, and pass the shake test before posting. That one sentence covers the method. Everything below explains how to do it properly, with UK materials, Royal Mail guidance, and the checks Mugnificentdeals uses before every parcel leaves the door.
Your 6-step quick checklist:
- Gather materials: double-walled corrugated outer box, smaller inner box, bubble wrap or honeycomb paper, kraft paper, void fill, strong parcel tape.
- Wrap the mug: tissue paper first on decorated surfaces, then two to three layers of bubble wrap or honeycomb paper, paying extra attention to vulnerable areas like the handle and rim.
- Pack the inner box: line the base with cushioning, centre the wrapped mug, fill every void so nothing shifts.
- Place the inner box inside the outer box: surround it on all six sides with void fill so the inner box floats and never touches the outer walls.
- Seal with H-tape: run tape along the centre seam and both short edges of every flap, top and bottom.
- Shake and drop test: hold the sealed parcel and shake it gently. Silence means it is ready. Any movement means more padding is needed.
Pro Tip: Photograph the open parcel showing all packing layers before you seal it. Insure24 notes that insurers commonly require photographic evidence of adequate packing when assessing claims, so that one photo can make all the difference.
Key takeaways
Double-boxing with at least 5cm of cushioning on all sides, H-taping every seam, and photographing internal packing before sealing are the three actions that most reliably prevent mug breakage in UK transit.
| Point | Details |
|---|---|
| Double-box with 5cm cushioning | Suspend the inner box inside the outer box with at least 5cm of void fill on all six sides. |
| No movement before sealing | Perform the shake test after sealing; any audible shift means more fill is needed. |
| H-tape every seam | Tape the centre seam and both short edges on every flap, top and bottom. |
| Photograph internal packing | Take photos before sealing; insurers may require evidence of adequate packing for claims. |
| Avoid black outer packaging | Some UK automated sortation systems cannot process black boxes, causing delays. |
Table of Contents
- What materials and tools do you need to pack a mug in the UK?
- How do you pack a single mug step by step?
- How do you choose the right box size?
- Why is double-boxing the gold standard for fragile ceramics?
- How do you pack two or more mugs in one parcel?
- How should you seal, label and choose a UK shipping service?
- What packing mistakes cause the most breakage?
- Mugnificent Deals' practical packing checks before every shipment
- The part most guides get wrong about shipping mugs
- Sources
What materials and tools do you need to pack a mug in the UK?
Assembling the right kit before you start saves time and prevents the temptation to improvise with whatever is to hand. Here is what to gather, and why each item earns its place.
Core materials list:
- Double-walled corrugated outer box — the structural backbone; single-wall boxes compress too easily under stacking pressure.
- Smaller inner box — sized to fit the wrapped mug snugly, leaving minimal internal movement.
- Bubble wrap — reliable shock absorption; two to three layers around the mug body.
- Honeycomb paper or kraft paper — a paper-based alternative that RhinoPack recommends as effective and more sustainable when layered correctly.
- Crumpled kraft paper or starch peanuts — void fill for the gap between inner and outer boxes.
- Moulded pulp inserts — purpose-shaped, excellent for repeat shipments of the same mug size.
- Strong parcel tape (at least 48mm wide) — rated for parcel use; avoid thin stationery tape.
- Cardboard dividers or partitions — for multi-mug parcels.
- Tissue paper — a soft first layer directly on decorated or glazed surfaces.
- Fragile labels — a courtesy signal to handlers, not a structural safeguard.
Cushioning options compared
| Cushioning material | Shock absorption | Surface protection | Sustainability | Best for |
|---|---|---|---|---|
| Bubble wrap | High | Good (with tissue layer) | Low (plastic) | Single mugs, general use |
| Honeycomb paper | Good when layered | Good | High (paper-based) | Eco-conscious senders |
| Moulded pulp | High | Excellent | High (recycled) | Repeat shipments, same size |
| Crumpled kraft paper | Moderate | Moderate | High | Void fill between boxes |
Pro Tip: For personalised or decorated mugs, always place a layer of tissue paper directly against the surface before any other wrap. Bubble wrap's plastic texture can leave faint impressions or cause abrasion on freshly printed designs, particularly when the parcel is compressed in transit.
How do you pack a single mug step by step?
A repeatable routine removes guesswork and keeps every mug you send to the same standard. Follow these steps in order.
- Inspect and clean the mug. Check for existing chips or cracks. A pre-existing crack will almost certainly worsen in transit, so check mug quality before shipping and document any marks with a photograph.
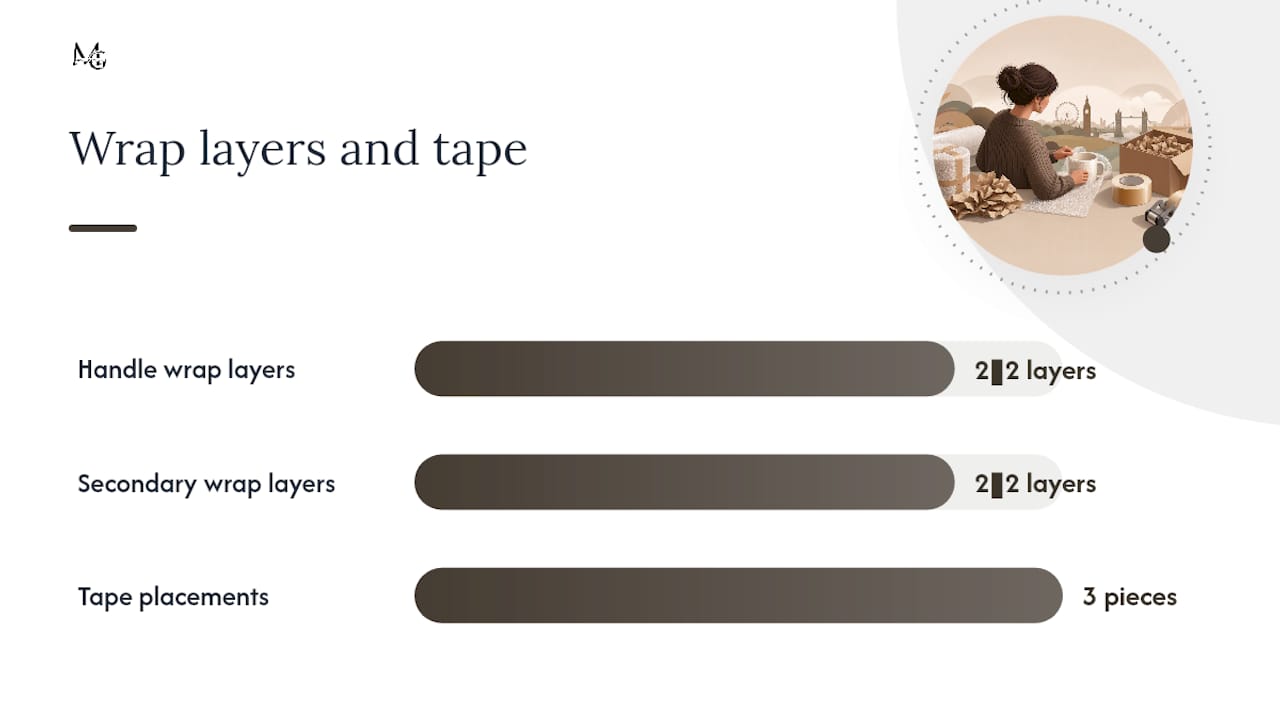
- Protect the handle first. Wrap the handle in two to three layers of bubble wrap or honeycomb paper and secure with a small piece of tape. The handle is the most vulnerable point on any ceramic mug.
- Apply the primary wrap. Lay the mug on a sheet of tissue paper and roll it fully, tucking the ends in. This protects decorated surfaces from abrasion.
- Apply the secondary wrap. Roll the tissue-wrapped mug in two to three layers of bubble wrap or honeycomb paper. Secure with tape at each end and in the middle.
- Line the inner box. Place 2–3cm of crumpled paper or bubble wrap on the base. Parcelpath recommends lining the bottom with approximately 5cm of cushioning, centring the item, and filling all remaining voids before sealing.
- Centre the mug. Place it upright or on its side, whichever orientation leaves the most even cushioning on all sides. The wrapped mug must not touch any wall of the inner box.
- Fill every void. Pack crumpled paper or starch peanuts around and above the mug until the box is full and firm. Close the flaps: they should close with light pressure, not bulge.
- Seal the inner box with tape. A single strip across the centre seam is enough here.
- Photograph the open inner box before closing it. This is your packing evidence.
- Shake test. Hold the sealed inner box and shake gently. No movement, no sound: proceed. Any shift means more fill is needed.
Pro Tip: Pay particular attention to the rim as well as the handle. Pottery practitioners advise that rims and handles are the first points to fracture, and that nothing inside the parcel should be able to shift and contact the outer wall.
How do you choose the right box size?
The measurement rule is straightforward: once the mug is fully wrapped, the inner box should fit it snugly, and the outer box should leave at least 5cm of clear space on every side of the inner box. That 5cm gap is where your void fill goes, and it is what makes the double-box method work.
Suggested box sizes for common UK mug types
For the inner box, single-wall corrugated is usually sufficient. For the outer box, use double-wall corrugated, particularly for international shipments or when parcels will be stacked. Royal Mail advises using strong, good-quality boxes and double-corrugated board for heavier items, and warns that worn or soft reused boxes reduce protection and may affect claims.
Avoid reusing boxes that show creasing, soft spots, or previous tape lines. A structurally compromised box offers far less protection than its size suggests.
Why is double-boxing the gold standard for fragile ceramics?
Think of the outer box as a crumple zone. When a parcel is dropped on a conveyor, compressed under a stack, or knocked sideways during sorting, the outer box absorbs the initial impact. The 5cm cushioning layer converts that impact into a much gentler deceleration before it reaches the inner box, and the inner box itself provides a second layer of structure around the mug.
Flextro's UK courier guidance confirms that the double-box method is the gold standard for fragile ceramics and prescribes at least 5cm of cushioning around the inner box on all sides.
How to build the suspension layer correctly:
- Choose an outer box sized to allow sufficient cushioning space around the inner box.
- Place a 5cm layer of void fill on the base of the outer box before lowering the inner box in.
- Centre the inner box so the gap is even on all four sides.
- Fill the remaining gaps with starch peanuts, crumpled kraft paper, or moulded pulp until the inner box cannot shift in any direction.
- Close the outer box flaps: they should meet cleanly without forcing.
Pro Tip: Reinforce the outer box corners and bottom seams with an extra strip of tape before you start filling. Corner failures are a common cause of box collapse under stacking pressure, and a few extra seconds of taping at the start prevents a much bigger problem later.
How do you pack two or more mugs in one parcel?
The governing principle is simple: each mug must be fully isolated so that no two items can touch, even under compression. When mugs collide, the force concentrates at the point of contact, and that is almost always the handle or rim.
Divider options compared:
| Method | Best for | Pros | Cons |
|---|---|---|---|
| Cardboard partitions | 2–6 mugs, standard sizes | Cheap, widely available, customisable | Less shock absorption than moulded options |
| Individual inner boxes | High-value or decorated mugs | Maximum isolation, easy to photograph | More material, more space needed |
| Moulded pulp trays | Repeat shipments, same mug size | Excellent fit, sustainable, professional | Higher upfront cost, less flexible |
Wrap each mug individually using the same method as for a single mug, then place each wrapped mug into its own cell or compartment. Handles should face inward or be padded so they cannot press against a partition wall. After placing all mugs, fill any remaining voids and perform the shake test. If you hear any movement at all, add more fill before sealing.
For lidded mugs, such as a porcelain mug with a lid, wrap the lid separately in tissue paper and bubble wrap, and pack it in its own cell or alongside the mug body with a cardboard separator between them.
How should you seal, label and choose a UK shipping service?
Sealing with H-tape
The H-tape method means running tape along the centre seam of every flap and then along both short edges where the flap meets the box side, forming an H shape. Do this on both the top and bottom of the box. Parcelpath's packing guide identifies H-taping as the standard method for maintaining box integrity during stacking and sorting. A single strip down the middle is not enough: the short edge seams are where boxes burst under pressure.
Labelling best practice
- Print or write the delivery address clearly, including a full postcode.
- Add a return address and a contact number.
- Apply FRAGILE stickers as a courtesy. As DHL Parcel notes, automated sortation relies on box integrity rather than manual reading of labels, so structural packing always matters more than a sticker.
- Avoid black outer packaging. Some UK automated sortation systems cannot process black boxes or wraps, which can cause delays or returns.
Choosing a UK service
Royal Mail's small parcel service suits standard mugs sent domestically when the parcel meets size and weight limits. For higher-value personalised mugs, a tracked and signed service adds a layer of accountability. For particularly valuable items, a courier offering declared-value cover and chain-of-custody records is worth the premium. Flextro's guidance notes that dedicated vehicle or direct-route services reduce handling points and lower damage risk for high-value fragile goods.
Pro Tip: Weigh and measure the sealed parcel before booking. Dimensional weight pricing means a light but bulky double-boxed parcel can cost more than its actual weight suggests, and knowing the figure in advance prevents unexpected surcharges at the Post Office counter.
What packing mistakes cause the most breakage?
Most mug damage in transit comes down to a handful of avoidable errors. Recognising them is the fastest way to improve your packing.
Common errors:
- Insufficient cushioning. The mug is wrapped but the void fill is thin or uneven, leaving the item able to shift inside the box.
- Inner item touching the outer box wall. This is the single most common cause of breakage: there is no suspension layer to absorb impact.
- Reused, soft or creased boxes. A box that has already been compressed offers a fraction of its original protection.
- Poor taping. A single strip down the centre seam will not hold under stacking pressure.
- Relying on FRAGILE stickers alone. Stickers do not change how automated systems handle parcels.
The shake test is your final quality check. Seal the parcel, hold it with both hands, and shake it gently in every direction. Any audible movement, any perceptible shift, means the packing is inadequate. Open it, add more void fill, reseal, and test again. Inadequate cushioning and internal movement are the leading causes of ceramic breakage in transit, and the shake test catches both before the parcel leaves your hands.
If you are uncertain whether your packing is robust enough, perform a simple drop test: hold the sealed parcel at waist height and let it drop flat onto a hard floor. If the contents survive without shifting, the packing is likely sufficient for standard courier handling.
Mugnificent Deals' practical packing checks before every shipment
At Mugnificentdeals, every personalised mug goes through a consistent pre-dispatch routine. These checks are straightforward to replicate at home.
Pre-collection checklist:
- Photograph the open inner box showing all packing layers before sealing.
- Photograph the sealed outer box with the label visible.
- Record the parcel's weight and dimensions after packing.
- Keep all packaging materials until any claim is fully resolved.
- Note the courier's declared-value limit and confirm the mug's value is covered.
Two simple tests worth running:
- Single-hand shake test: hold the sealed parcel in one hand and shake it. One hand is more sensitive to subtle movement than two.
- Local test shipment: for a new mug design or box size, send a test parcel to a local address before committing to a full batch. This catches box-size mismatches and cushioning gaps cheaply.
Pro Tip: Keep a dedicated packing kit in a small bag or box: pre-cut sheets of honeycomb paper, a roll of 48mm parcel tape, tissue paper, and a stock of fragile labels. Having everything in one place means packing is faster, more consistent, and less likely to be rushed.
The part most guides get wrong about shipping mugs
Most packing guides spend the majority of their word count on materials lists and then treat the double-box method as an optional upgrade for expensive items. That framing is back to front. The double-box method is not a premium option: it is the baseline for any ceramic mug travelling through a UK parcel network, regardless of value.
Here is why that matters. A single well-wrapped mug inside a single box, however carefully packed, is still one impact away from the outer wall. Conveyor drops, compression under stacked parcels, and side impacts during vehicle loading are not edge cases; they are routine events in any shared parcel network. The 5cm cushioning gap between inner and outer box is what converts a sharp impact into a manageable deceleration. Without it, the wrap around the mug is doing a job it was never designed to do alone.
The other thing guides consistently underweight is photographic evidence. Photographing internal packing before sealing takes thirty seconds and costs nothing, yet it is the single most useful action a sender can take if a claim becomes necessary. A courier's liability is limited, and an insurer's assessment almost always turns on whether packing was adequate. A photograph answers that question immediately.
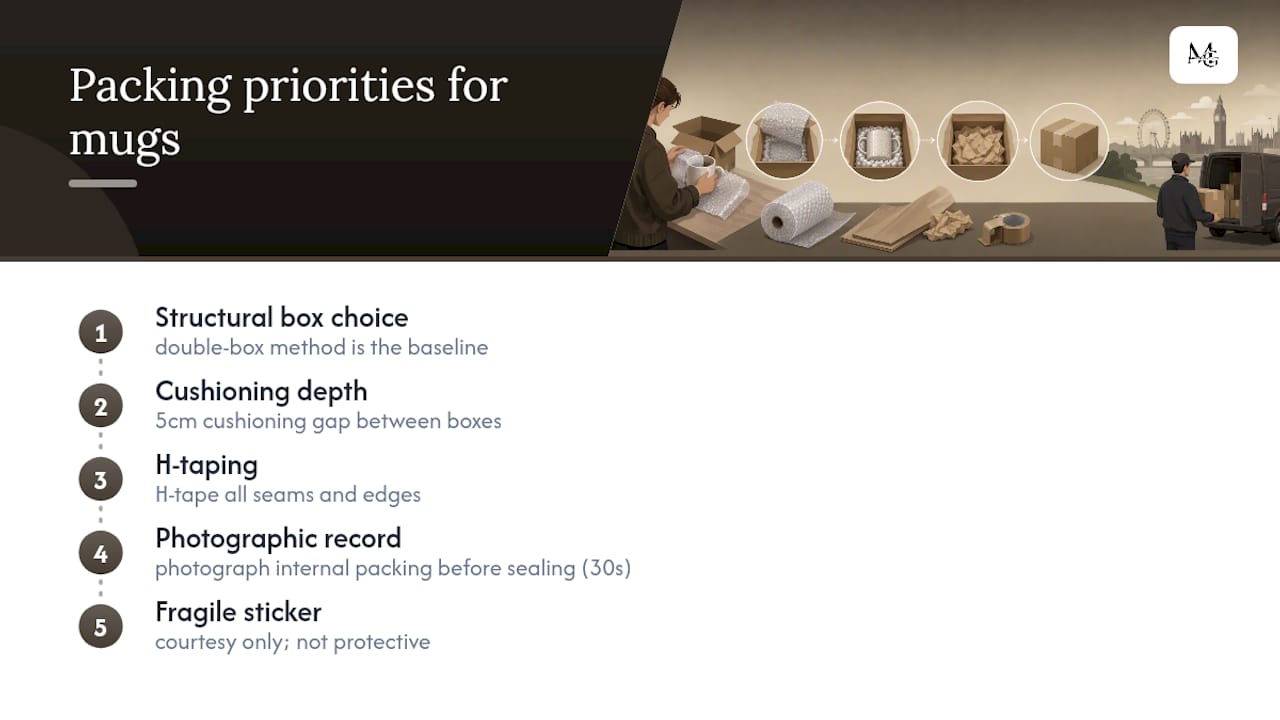
What actually matters, in order: structural box choice first, cushioning depth second, H-taping third, photographic record fourth. FRAGILE stickers come last, and only as a courtesy. If you get the first four right, the sticker is a minor bonus. If you skip the first four and rely on the sticker, the mug is at serious risk.

If you are packing a mug to send as a gift, it is worth making sure the mug itself is worth the effort. Mugnificentdeals designs personalised music mugs for musicians, music teachers, and anyone who wants a gift that feels genuinely considered rather than grabbed off a shelf. Each mug is made to order, and every order is packed with the same care this guide describes.
Sources
- Sending Fragile Goods by Courier UK: A Business Guide | Flextro
- How to package and send fragile items | Royal Mail Group Ltd
- DHL Parcel — sending fragile items
- How to pack cups and mugs: secure packaging solutions by RhinoPack
- How To Ship A Mug Safely: Your complete packing guide
- Goods-in-transit insurance for fragile ceramic products: a practical UK guide | Insure24