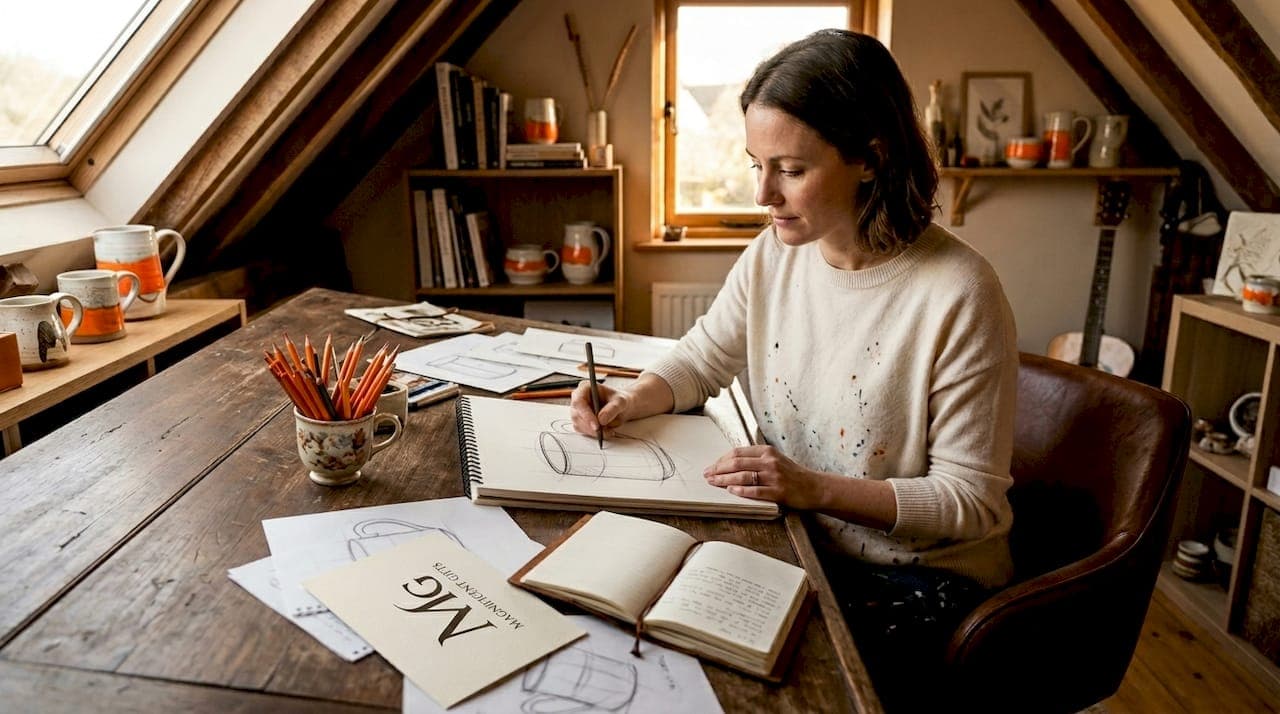
The process for sketching instrument mugs is defined as a structured sequence of steps that begins with constructing the mug's geometric foundation, positions a musical instrument motif with correct perspective, and finishes with durable media applied to a ceramic surface. This guide covers every stage: from drawing the first construction line to baking your porcelain marker artwork into a dishwasher-safe finish. You will need pencils, ceramic paints or porcelain markers, and either a lightbox or chalk for transferring your design. Whether you are sketching a guitar-wrapped mug for a gift or creating a full drum kit illustration for your own shelf, the method is the same. Start with structure, then add the music.
What basic shapes and proportions to use when sketching mug structure
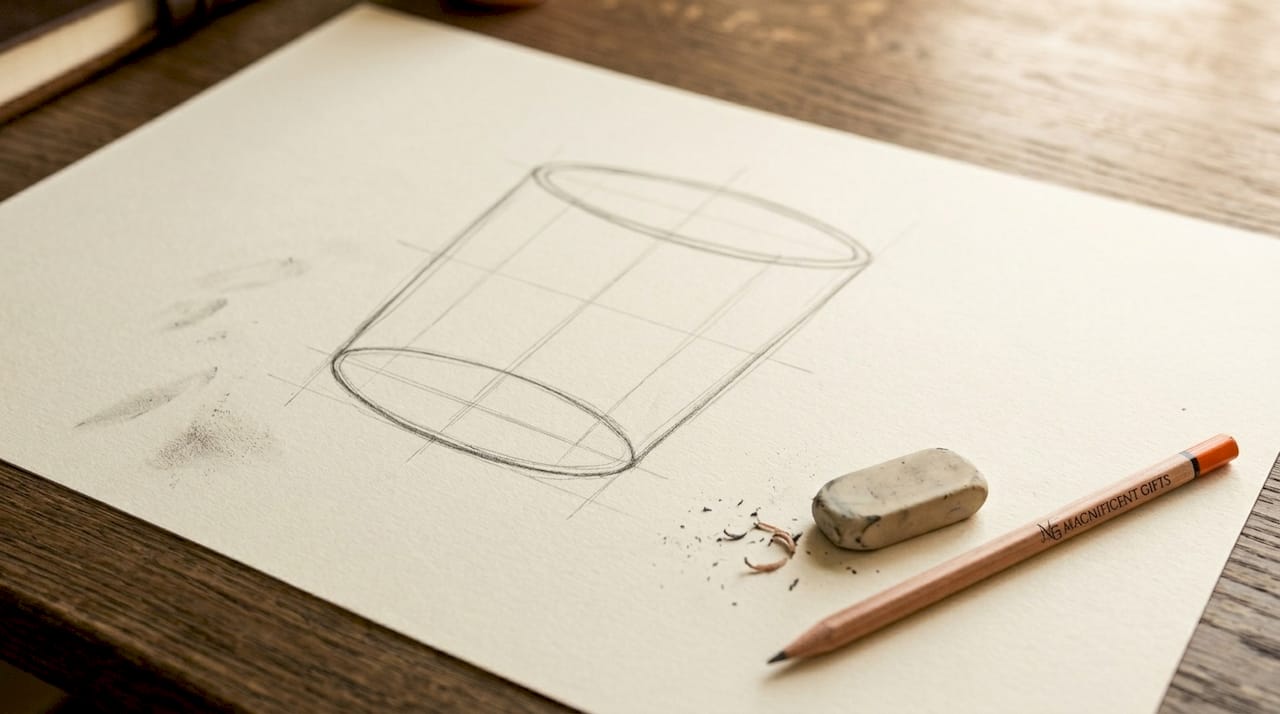
The mug form is the canvas, and getting it right before you add any instrument detail is the single most important step in the entire process. A central vertical axis anchors everything: two ellipses, one for the rim and one for the base, sit at the top and bottom of this axis respectively. The ellipses should be slightly different in width to reflect the natural taper of a mug viewed at eye level.
Once your ellipses are placed, connect them with two slightly tapered vertical lines. The wider end sits at the rim, the narrower at the base. Keep these construction lines light and loose during this early phase, adjusting until the proportions feel correct before committing to any detail.
The handle follows a specific rule. According to the proportional guidance for handles, the loop should be placed approximately one-third down from the rim and drawn about one-quarter as wide as the mug body. Think of it as a rounded ear that curves naturally away from the cylinder, not a flat bracket bolted to the side.
Here is a numbered sequence for building the mug structure:
- Draw a vertical central axis line as your guide.
- Sketch a wide, shallow ellipse at the top for the rim.
- Draw a slightly narrower ellipse at the base.
- Connect the two ellipses with gently tapered vertical sides.
- Add the handle as a simple loop, one-third down from the rim, one-quarter the mug's width.
- Review proportions and adjust construction lines before moving forward.
Pro Tip: Keep a clean eraser close during the construction phase. Light, adjustable lines are the hallmark of confident sketching. Committing too early to heavy pencil marks makes corrections messy and can damage the paper or mug surface.
How do you simplify instrument motifs for a curved mug surface?
Translating a violin or a grand piano onto a curved ceramic surface sounds complicated, but shape simplification makes it manageable. Every instrument, no matter how ornate, breaks down into geometric primitives: a guitar becomes an oval body with a rectangle neck, a drum kit becomes stacked cylinders, a piano keyboard becomes a flat rectangle with alternating thin rectangles for keys.

The mug's 3D silhouette acts as a blueprint for correct perspective. Anchoring motifs to structural mug outlines prevents the "sticker effect," where artwork looks pasted on rather than painted onto the surface. The instrument shapes should follow the gentle curve of the mug body, not sit rigidly flat against it.
Practical rules for positioning instrument motifs:
- Plan the full layout on paper before touching the mug. A rough thumbnail sketch takes two minutes and prevents hours of regret.
- Avoid placing the main motif too close to the handle, as the curved junction distorts proportions and makes fine detail difficult to read.
- Work small and deliberate. Bold, strong outlines read far more clearly on a curved surface than clusters of fine pencil marks.
- Use chalk for removable placement templates on the mug. Chalk wipes away cleanly and lets you reposition before committing to paint or marker.
- Leave breathing room around the motif. White space on a mug is not wasted space; it gives the eye somewhere to rest and makes the instrument image feel intentional.
Pro Tip: Photograph your paper thumbnail sketch and hold your phone next to the mug. Comparing the two side by side reveals proportion problems before you transfer anything to the ceramic surface.
What materials and tools work best for finishing instrument mug art?
Choosing the right media is not a stylistic preference; it determines whether your artwork survives a dishwasher cycle or fades after a fortnight. The three most practical options for instrument-themed mug art are ceramic paints, porcelain markers, and permanent markers such as Sharpies, each with its own curing and sealing protocol.
| Media | Application method | Curing process | Durability |
|---|---|---|---|
| Ceramic paint | Brush, fine detail brush | Air dry, then bake per manufacturer instructions | High, dishwasher-safe when baked |
| Porcelain markers (e.g. Edding 4200) | Direct marker tip | 15 min dry, bake at 160°C for 25 min | High, dishwasher-safe after baking |
| Permanent markers (e.g. Sharpie) | Direct marker tip | Air dry, then 28-day cure with clear ceramic sealer | Moderate, hand-wash recommended |
Porcelain markers are the preferred tool for instrument-themed mug art because they offer fine tip control for detail work and become genuinely permanent after baking. The Edding 4200 range, for example, includes brush tips from 1 to 4 mm, which suits both the bold outlines of a guitar body and the fine strings of a violin.
For design transfer, a lightbox is the most reliable method. Place your paper sketch beneath the mug, shine the light through, and trace directly onto the ceramic surface with a light pencil or chalk line. Freehand sketching directly onto the mug is also valid, particularly for artists comfortable with loose, expressive line work. Careful layout using removable sketch lines prevents cramped or misplaced designs and gives you the confidence to apply final outlines cleanly.
When using permanent markers, sealing is non-negotiable. Apply a thin first coat of clear ceramic sealer, allow it to dry fully, then add one or two further coats without rubbing aggressively. The 28-day curing period for Sharpie-based artwork is not optional if you want the design to last.
Pro Tip: Test your chosen marker or paint on the base of a spare mug before working on the visible surface. Ceramic surfaces vary in porosity, and a quick test reveals how the media flows and dries on your specific mug.
Step-by-step process for creating your music-themed instrument mug
This section brings every element together into a single, repeatable workflow. Follow these steps in order, and you will move from a blank mug to a finished piece with confidence.
- Prepare your workspace. Clean the mug surface with rubbing alcohol to remove oils and dust. Lay out your pencils, markers or paints, chalk, and reference images of your chosen instrument.
- Sketch the mug structure on paper. Draw the central axis, rim ellipse, base ellipse, and tapered sides. Add the handle with correct proportions: one-third down from the rim, one-quarter the mug's width.
- Refine the mug contour. Adjust construction lines until the silhouette looks natural and three-dimensional. This paper sketch becomes your perspective blueprint.
- Design the instrument motif. Break your chosen instrument into geometric primitives on paper. A guitar uses an oval body, a rectangle neck, and small circles for tuning pegs. A trumpet uses a series of overlapping cylinders and a flared bell shape.
- Plan the layout on the mug. Use chalk to lightly mark the boundaries of your design on the ceramic surface. Check placement from multiple angles before proceeding.
The next phase moves from planning to application:
- Transfer the design using a lightbox, freehand chalk sketch, or light pencil marks directly on the mug.
- Apply outlines first using your chosen media. Work from the largest shapes down to the finest details, keeping lines bold and deliberate.
- Add colour or tonal shading once outlines are dry. Ceramic paints layer well; porcelain markers can be blended while still wet.
- Allow the design to dry fully before handling. Rushing this stage smears outlines and ruins hours of careful work.
- Cure or bake according to your media's instructions. For porcelain markers, bake at 160°C for 25 minutes. For ceramic sealers over permanent markers, apply multiple thin coats and allow the full curing period.
- Clean the mug gently after the first use. Hand-washing is recommended for sealed permanent marker designs; baked porcelain marker designs are generally dishwasher-safe.
For artists interested in pushing the concept further, open-source mug-generator tools can convert 2D instrument drawings into 3D-printable STL files, enabling custom instrument-shaped mugs that go beyond illustration entirely. This is an advanced route, but it shows how the same design principles scale from paper sketch to physical prototype.
You can find further inspiration for personalised music mug designs that demonstrate how these techniques translate into finished products.
Key takeaways
Successful instrument mug sketching requires a structured foundation, deliberate motif placement, and the correct curing process for whichever media you choose.
| Point | Details |
|---|---|
| Build the mug structure first | Use a central axis and two ellipses to construct a proportionally accurate mug before adding any instrument detail. |
| Simplify instrument shapes | Break guitars, drums, and keyboards into geometric primitives to maintain correct perspective on a curved surface. |
| Choose media carefully | Porcelain markers baked at 160°C for 25 minutes deliver the most durable, dishwasher-safe finish for mug art. |
| Transfer with removable guides | Use chalk or light pencil marks to plan layout on the mug before committing to permanent outlines. |
| Cure and seal properly | Permanent marker designs require a clear ceramic sealer applied in thin coats and a 28-day curing period for lasting results. |
Why simplification is the skill most artists underestimate
There is a temptation, especially when you love music, to draw every fret wire on the guitar or every valve on the trumpet. I understand it completely. But the mugs that read most powerfully from across a room are the ones where the artist made a decision to leave things out.
The discipline of simplification is not about drawing less. It is about drawing only what carries meaning. A guitar silhouette with three bold curves and a clean headstock communicates "guitar" instantly. Add forty pencil marks trying to capture every detail and you end up with something that reads as noise rather than music.
The other pitfall I see consistently is rushing the transfer stage. Artists spend an hour on a beautiful paper sketch, then transfer it to the mug in five minutes with shaky lines because they are excited to get to the painting. That impatience undoes the preparation. The planning and transfer phase deserves the same care as the original sketch.
Quality tools genuinely matter here. A fine-tipped porcelain marker gives you control that a cheap craft marker simply cannot match. The investment is small relative to the time you spend on the design. And the finish process, whether baking or sealing, is not an afterthought. It is the step that turns a sketch into something someone will use every morning for years.
Music motifs on mugs carry a particular kind of storytelling weight. A violin on a mug says something specific about the person holding it. That specificity is what makes instrument-themed mug art worth doing carefully.
— Lasse
Explore personalised music mugs from Mugnificentdeals
If you want to see how these sketching principles translate into finished products, Mugnificentdeals has built an entire collection around instrument-themed mug art. Every design reflects the same process described in this guide: clean geometric foundations, bold outlines, and motifs that feel drawn rather than printed.

Browse the personalised music mugs collection for ready-made designs featuring guitars, violins, drums, and more. Each mug is available with personalisation options, making them ideal gifts for musicians who deserve something more considered than a generic present. For curated gift ideas, the best music mugs for gifts selection brings together the most popular designs in one place.
FAQ
What is the first step in sketching a mug for instrument art?
The first step is drawing a vertical central axis with two ellipses for the rim and base, then connecting them with slightly tapered vertical sides. This structural foundation keeps your instrument motif in correct perspective on the curved surface.
Which markers are best for decorating instrument mugs?
Porcelain markers such as the Edding 4200 are the most reliable choice, as they offer fine tip control and become dishwasher-safe after baking at 160°C for 25 minutes. Permanent markers like Sharpies are a lower-cost alternative but require a clear ceramic sealer and a 28-day curing period.
How do you transfer an instrument sketch onto a mug?
Use a lightbox to trace your paper sketch directly onto the mug surface, or apply a light chalk outline as a removable guide before committing to permanent media. Chalk wipes away cleanly and allows you to reposition the design without damaging the ceramic.
How do you prevent instrument motifs from looking flat on a mug?
Anchor the motif to the mug's structural outline rather than drawing it as a standalone image. Following the gentle curve of the mug body and using the central axis as a reference point prevents the artwork from appearing like a flat sticker applied to the surface.
Can you make instrument mug art dishwasher-safe?
Yes. Ceramic paints and porcelain markers both become dishwasher-safe when baked according to the manufacturer's instructions. Permanent marker designs sealed with a clear ceramic sealer are more durable with hand-washing and benefit from the full 28-day curing period before regular use.