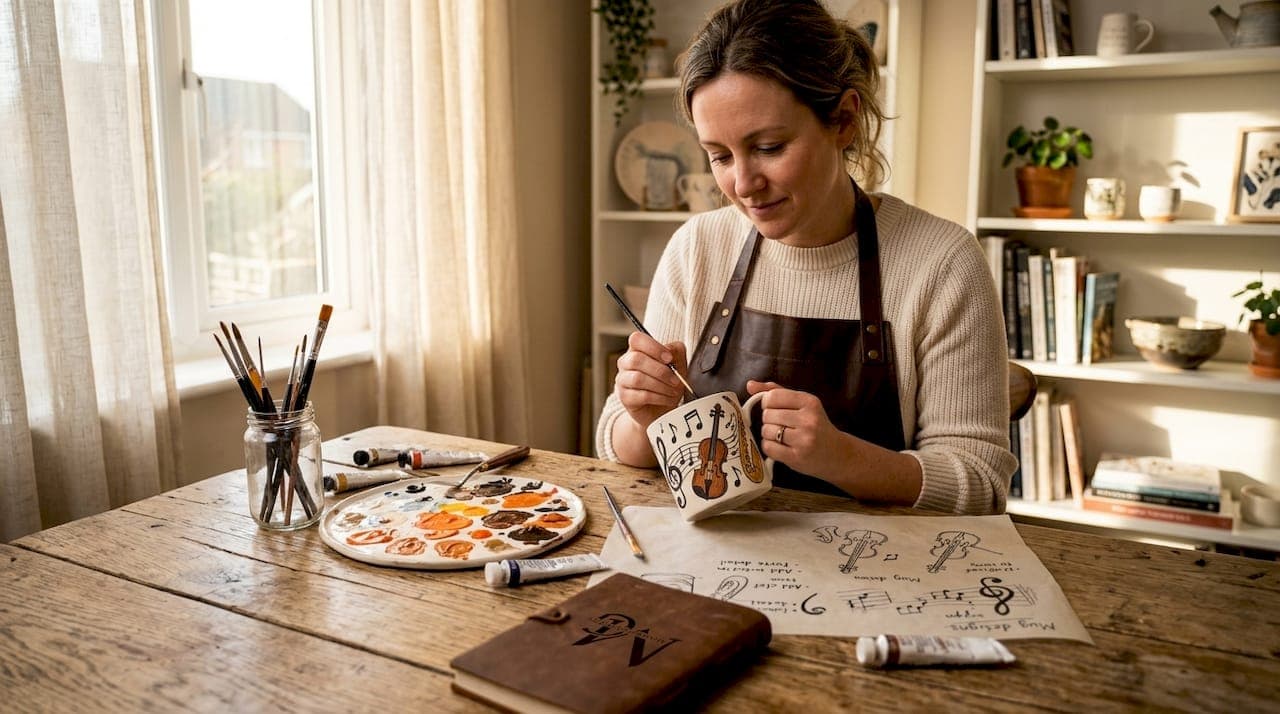
Turning a plain ceramic mug into something that speaks your musical language is one of those creative projects that sounds simple but rewards patience enormously. This music themed mug art guide covers everything you need to know about ceramic mug painting, a craft with roots in hand-decorated pottery traditions, to create personalised designs that last. Whether you want to capture a spiral of sheet music, your favourite instrument, or a wry lyric that makes you smile every morning, you will find the materials, methods, and inspiration here to do it properly and durably.
Key takeaways
| Point | Details |
|---|---|
| Choose the right paint | Use ceramic or enamel paints for durability; regular acrylics chip quickly on non-porous surfaces. |
| Plan before you paint | Sketch your music design lightly in pencil before applying any paint to avoid costly mistakes. |
| Heat-cure for longevity | Bake your finished mug at around 180°C (350°F) for 30 to 60 minutes to set the paint permanently. |
| Avoid the drinking rim | Keep all paint at least 6mm below the rim and away from the interior for food safety. |
| Care extends lifespan | Handwash your decorated mug gently to preserve colours and prevent peeling over time. |
Materials and tools for music mug painting
Before a single brushstroke touches your mug, gathering the right supplies makes the difference between a design that lasts years and one that flakes off within a week. This is not a project where any old craft paint will do.
The right mug matters. Smooth, white ceramic or porcelain mugs give you the cleanest canvas. Glossy surfaces accept paint differently from matte ones, so test a small area if you are unsure. Avoid textured or heavily glazed mugs for your first project as they make masking and detailing much harder.
Here is a summary of the core materials you will need:
| Material | Purpose | Notes |
|---|---|---|
| Ceramic or enamel paint | Main colouring medium | Heat curing stabilises paint for a durable finish |
| Porcelain paint markers | Fine detail and lettering | Ideal for musical notation and lyrics |
| Flat and round brushes | Broad fills and fine lines | Synthetic bristles work best on curved surfaces |
| Painter's tape | Masking straight lines | Use low-tack to avoid lifting base layers |
| Stencils (cardstock) | Creating repeat motifs | Notes, treble clefs, soundwave shapes |
| Pencil | Light sketching | Marks burn off during curing |
| Spouncer or sponge dauber | Stippled or gradient effects | Great for soundwave or galaxy backgrounds |
| Rubbing alcohol or white spirit | Surface preparation | Removes oils and grease before painting |
Selecting your paints. Ceramic and enamel paints are specifically formulated to bond with non-porous surfaces and survive heat. Regular acrylic craft paints are less durable and will not hold up to daily washing even after curing. Porcelain paint markers are excellent for lettering a favourite lyric or drawing a detailed treble clef because they give you pen-like control without a brush.
Pro Tip: Wipe your mug down thoroughly with rubbing alcohol before you begin. Even fingerprints carry enough oil to prevent paint from bonding properly, and that invisible barrier is one of the most common causes of peeling.
Design concepts for music-inspired mug art
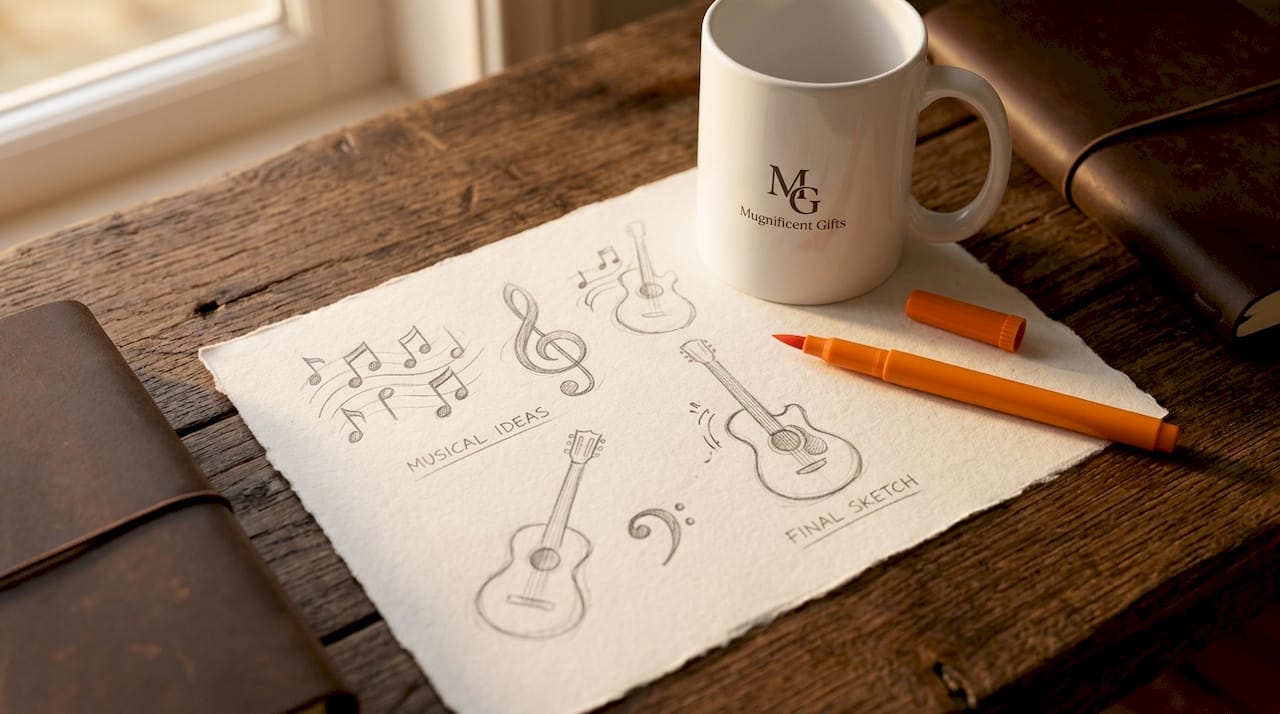
Great musical artwork for mugs starts with a clear concept, not a blank surface and a vague idea. Thinking through your design before picking up a brush is what separates a polished result from a muddled one.
Music mug design prompts worth exploring include:
- Sheet music strips: Paint a horizontal band of musical staves around the mug's body. Fill in actual notes from a piece you love or invent a decorative pattern.
- Instrument silhouettes: A guitar neck, violin scroll, or piano keys in black and white reads strikingly against a coloured background.
- Soundwave graphics: Trace the waveform of your favourite song using audio editing software as reference, then transfer it to the mug as a graphic band.
- Vinyl record rings: Concentric circles in grey and black evoke a record's surface and work beautifully on the mug's base or side.
- Lyric typography: Choose a short, meaningful line and letter it in an arc around the mug. A porcelain marker gives you the control to make this look intentional rather than rushed.
- Musical symbols: Treble clefs, quavers, semiquavers, and dynamic markings (piano, forte, sforzando) are immediately recognisable and graphic enough to work at small scales.
Once you have chosen your theme, sketch the layout on paper first. Mark where the design sits vertically on the mug, how wide it runs horizontally, and whether you want a single focal motif or a repeating pattern. Wrapping a strip of paper around the mug and sketching on that gives you a true sense of how the proportions will translate to the curved surface.
Colour palettes deserve thought too. Black and white feels classic and suits instrument drawings or sheet music designs perfectly. A monochrome base with a single accent colour, such as gold for note heads or red for a lyric highlight, creates a professional look without demanding advanced blending skills.
Using masking techniques. Stencils and painter's tape give crisp edges that are very difficult to achieve freehand on a curved surface. Combine both: use tape to block off straight horizontal borders and a cardstock stencil cut to your note shape within that zone.
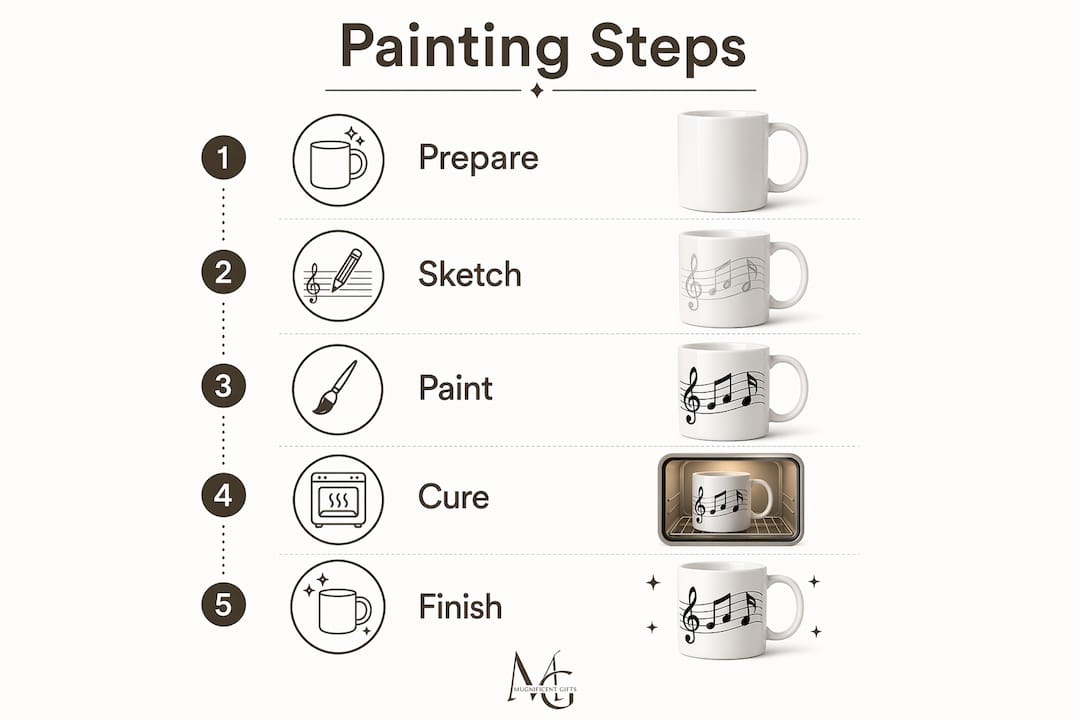
Step-by-step guide to painting and heat-curing your mug
This is where preparation meets practice. Follow these steps carefully and you will produce a durable, personalised music mug that survives daily use.
-
Clean the mug surface. Wipe the entire exterior with rubbing alcohol and allow it to dry completely. Handle the mug only by the handle from this point to keep the painting area oil-free.
-
Apply painter's tape and stencils. Map out your design boundaries with low-tack tape. If you are using a stencil, secure it firmly against the mug's curve with small pieces of tape to prevent paint bleeding underneath.
-
Sketch your design lightly. Use a soft pencil to draw your musical motifs directly onto the ceramic. Proper mug painting begins with a light pencil sketch; the marks will vanish during curing so there is no need to erase them perfectly.
-
Apply paint in thin layers. Load your brush lightly and build up colour gradually. Thin layers dry and cure better on non-porous ceramic. Allow each coat to dry for two to four hours before adding the next.
-
Remove tape carefully. Once your final layer is touch-dry but not fully cured, use a craft knife to score gently along tape edges before peeling. This prevents lifting paint that has bridged across the tape line.
-
Allow full air-drying. Leave the painted mug at room temperature for at least 24 hours before curing.
-
Heat-cure in the oven. Place the mug in a cold oven, then set the temperature to 180°C (approximately 350°F). Avoid thermal shock by never placing the mug into a preheated oven. Bake for 30 to 60 minutes, then switch off the oven and allow the mug to cool inside with the door ajar.
Starting the mug in a cold oven and cooling it gradually inside is the single most effective way to prevent cracking. Temperature shock is the beginner's most common and most avoidable mistake.
Here is a quick comparison of curing methods to help you decide which suits your timeline:
| Curing method | Time required | Durability | Best for |
|---|---|---|---|
| Oven baking at 180°C | 30 to 60 minutes | High, often dishwasher-safe | Mugs for regular daily use |
| Air curing at room temperature | Approximately 21 days | Moderate | Decorative or display mugs |
Both curing methods are valid, but oven baking delivers a noticeably harder finish that holds up to handwashing far better.
Pro Tip: If your design includes multiple colours that meet at an edge, cure after each colour stage rather than waiting until all colours are complete. This locks each layer in place and reduces the risk of colours bleeding into one another during the final cure.
Finishing touches and caring for your mug art
Your design is cured and looking exactly as you imagined. Now the goal is to keep it that way for as long as possible.
- Never paint inside the mug or near the rim. Paints are not food-safe for interior surfaces. Keep all decoration at least 6mm (approximately a quarter inch) below the outer rim and entirely off the interior. This is a non-negotiable safety rule.
- Handwash only, using gentle soap. Even oven-cured ceramic paint is not as robust as factory-fired glaze. A soft cloth and mild washing-up liquid are all you need.
- Avoid scrubbing pads and abrasive cleaners. These will scratch and dull the paint surface over time, even on a cured finish.
- Do not use the microwave. Metallic paints or metallic markers contain metal particles that can arc in a microwave. Even non-metallic designs can be damaged by uneven heating.
- Store carefully. If you are gifting or storing the mug, wrap it in tissue paper rather than stacking it directly with other mugs. Paint edges are most vulnerable to chipping when knocked.
Pro Tip: If your design begins to look slightly faded after several months, a thin coat of clear ceramic glaze applied over the design and re-cured can refresh the surface and add a layer of protection. Test on a small area first to check compatibility with your original paint brand.
Troubleshooting is worth addressing directly. If paint is peeling shortly after curing, the most likely culprits are insufficient surface cleaning, paint applied too thickly, or curing at the wrong temperature. If fading occurs over weeks, the mug is likely being cleaned too aggressively or exposed to soaking. Most issues trace back to one of those three causes.
My perspective on DIY music mug art
I have spent a good deal of time thinking about what makes music mug art genuinely satisfying rather than merely decorative, and my honest view is that the creative process matters as much as the finished object.
What I have found is that beginners consistently underestimate the power of simplicity. A single well-executed treble clef in black on a white mug outperforms a chaotic arrangement of five different motifs every time. The mugs that draw compliments are usually the ones where someone made a deliberate choice and committed to it.
The gifting dimension of this craft is something I find particularly compelling. A mug painted with a friend's instrument, or lettered with a lyric only the two of you would recognise, carries a kind of specificity that purchased gifts rarely manage. If you want some inspiration on meaningful mug gift ideas, there is real thought to be drawn from how personalisation changes the emotional weight of an object.
I would also encourage anyone feeling daunted by painting to consider alternatives. Ceramic decals, glaze pens, and even sublimation printing each offer different levels of technical demand and different aesthetic results. Painted mug art, as distinct from heat-activated or special-effect mugs, requires patience with layering and curing. Knowing that before you start sets realistic expectations and prevents the frustration that comes from comparing your first attempt to a studio-finished piece.
My strongest recommendation: practise your design on paper, commit to your palette, and resist the urge to add more once the design feels complete. The restraint is usually the right call.
— Lasse
Find your perfect music mug at Mugnificentdeals

If the DIY process feels like a longer commitment than your schedule allows, or if you want a professionally finished piece to sit alongside your own creations, Mugnificentdeals offers a curated collection of personalised music mugs designed with exactly the kind of intentional, sketched personality this guide celebrates. Each design is crafted for musicians and music lovers, from instrument-specific artwork to clever humour that earns a smile rather than demanding one.
The collection includes options for music mugs as gifts, with personalisation for names, instruments, and inside references that make them feel commissioned rather than grabbed off a shelf. Whether you are buying for a violinist, a bedroom producer, or someone who considers air guitar a legitimate skill, there is a design that will speak their language from the first morning coffee onwards.
FAQ
What paints work best for music-themed mug art?
Ceramic and enamel paints are the most durable choice for mug painting. They bond well with non-porous surfaces and, when heat-cured, produce a finish that withstands regular handwashing.
How do I stop paint from peeling off my decorated mug?
Thorough surface preparation with rubbing alcohol, thin paint layers with adequate drying time between coats, and proper oven curing at around 180°C for 30 to 60 minutes are the three steps that prevent peeling.
Can I put a painted music mug in the dishwasher?
Oven-cured ceramic paint is more dishwasher-resistant than air-dried paint, but handwashing is still recommended to maximise the lifespan of your design and prevent gradual fading.
What music designs work best for beginners?
Instrument silhouettes, single lyric lines using a porcelain marker, and simple soundwave bands are all strong starting points because they rely on clean lines rather than complex blending or shading.
Is it safe to paint the inside of a mug?
No. Ceramic paints are not food-safe for interior surfaces. Keep all designs on the exterior and at least 6mm below the outer rim to avoid any contact with beverages.